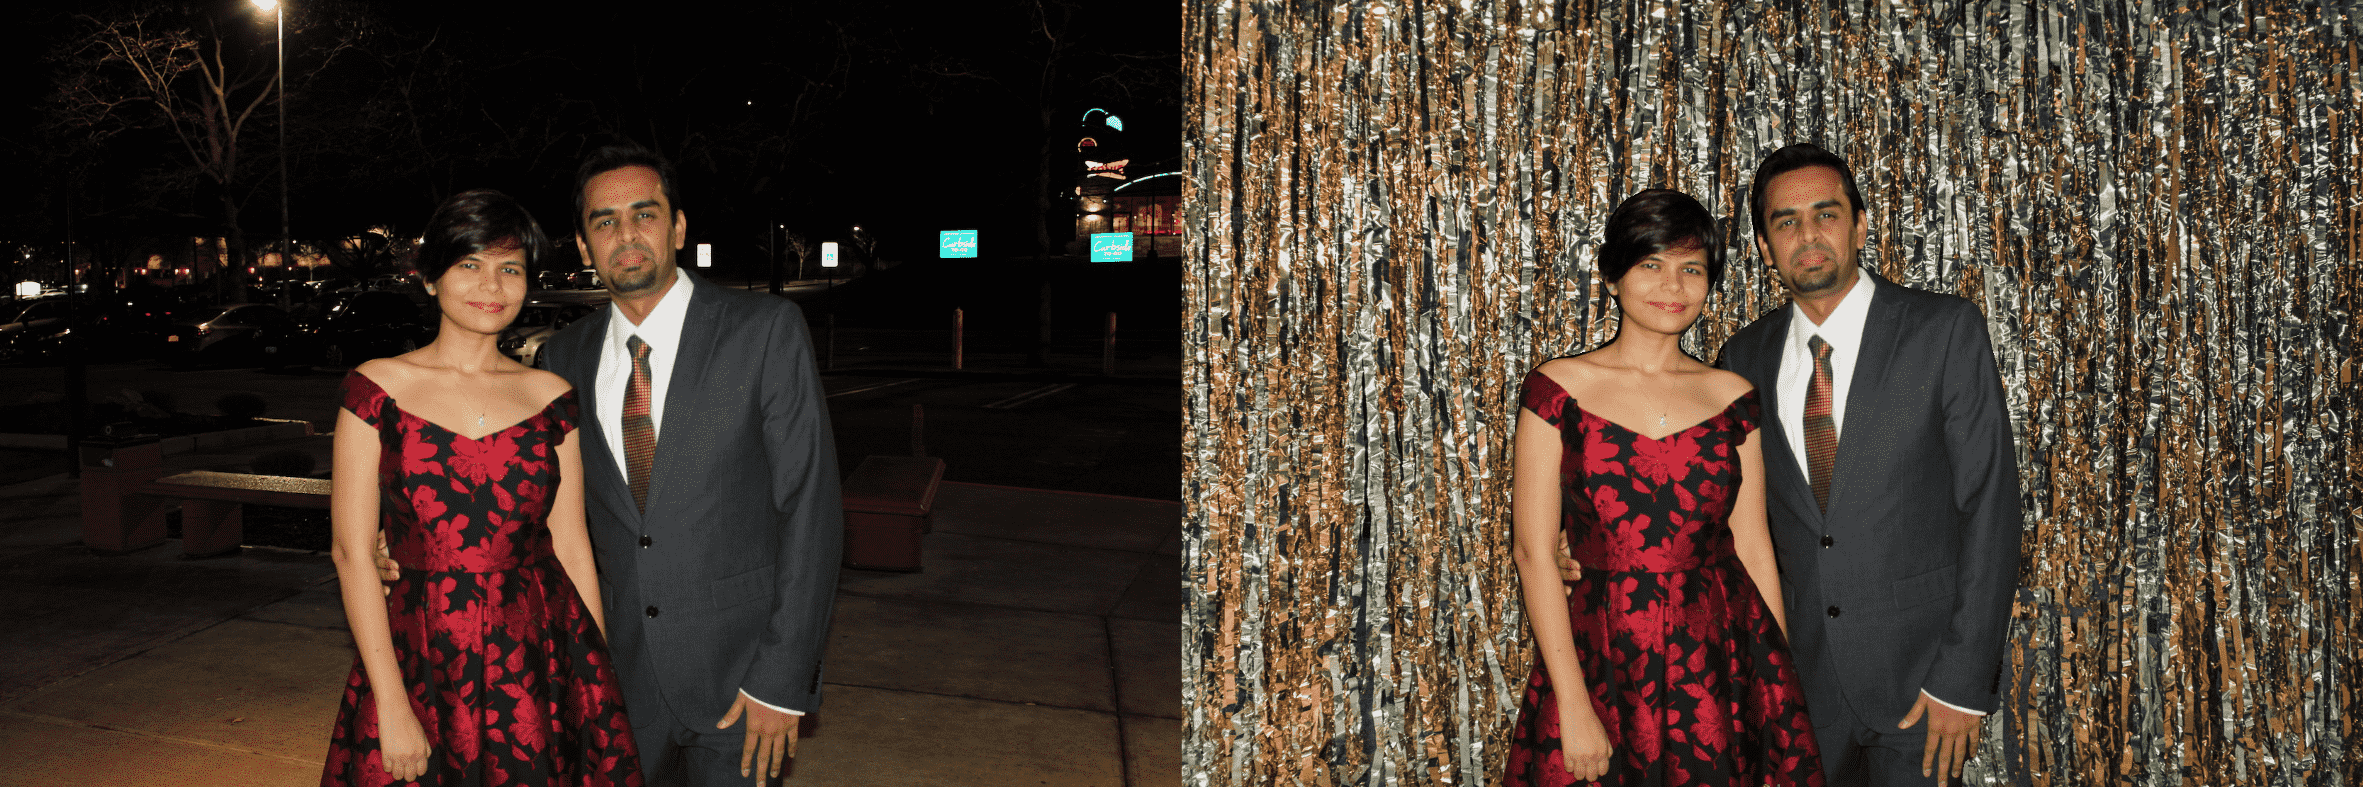
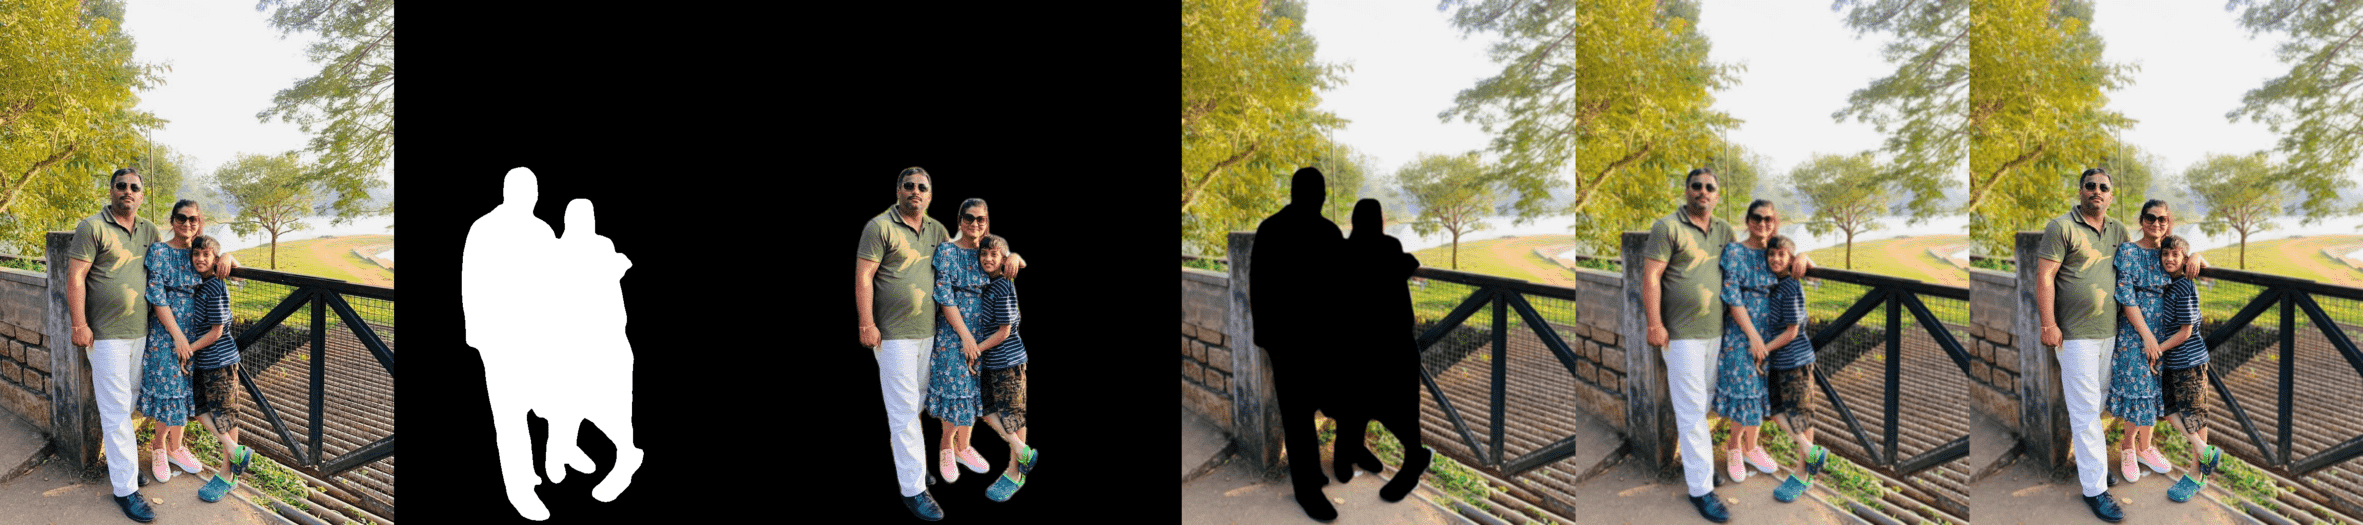
图:语义分割和 alpha blending 技术用于改变图像的背景.

图:使用语义分割和 alpha blending 的处理流程. 将背景区域像素值设为 0.
完整实现:https://github.com/shilpibhattacharyya/customizing_image_backgrounds
是否有使用 Photoshop 进行图像背景白化(whiten)和改变时抓狂的时候呢?有的话,请进入语义分割.
1. 语义分割
语义分割是一种将图像中每个像素进行归类的图像分析任务. 类似于人的方式,当人在看一幅图像时,知道图像的每个像素属于哪一类.
更多关于语义分割的资料,可参考:Image Segmentation - 2018.11.05
这里采用 DeepLabV3 进行语义分割,alpha blending 进行将原图融合到新背景.
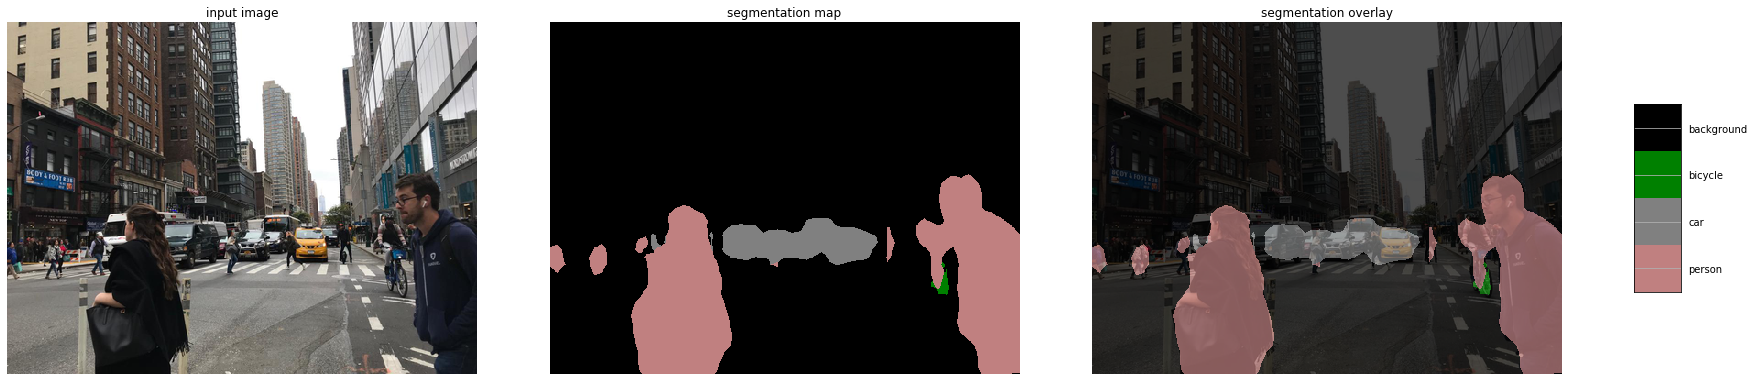
图:输入图像采用 Deeplab 模型语义分割处理. 期望输出是,覆盖在输入图像上的语义标签. 语义分割模型关注与对图像中每个像素分配语义标签,如sky, person, car 等.
DeepLab 是 Google Brain 提出的语义分割结构,其是一种先进的语义分割深度学习模型. 其系列主要有:
- DeepLabv1 - 采用 atrous conv 来显式地控制网络中所计算的特征图的分辨率;
- DeepLabv2 - 采用 atrous spatial pyramid pooling(ASPP) 来鲁棒的分割物体,其在不同的采样率和有效接受野进行多尺度处理(using atrous spatial pyramid pooling (ASPP) to robustly segment objects at multiple scales with filters at multiple sampling rates and effective fields-of-views);
DeepLabv3 - 采用图像层(image-level)特征来增强 ASPP 模块,以捕获更大范围的特征. 此外,还包含 batch normalization 参数来提升模型训练. 具体来说,在训练和验证阶段,采用 atrous conv 提取不同输出步长(output strides)的输出特征,有效的增强了在步长=16 的 BN 训练,且验证阶段在步长=8时获得了更好的效果.
google - deeplab
2. 语义分割实现
2.1. 分割输出解码
函数:将 2D 分割图像转换为 RGB 图像,其中每一个标签被映射到对应的颜色.
import numpy as np

def decode_segmap(image, nc=21):
    label_colors = np.array([(0, 0, 0),  # 0=background
    # 1=aeroplane, 2=bicycle, 3=bird, 4=boat, 5=bottle
    (128, 0, 0), (0, 128, 0), (255, 255, 255), (0, 0, 128), (128, 0, 128),
    # 6=bus, 7=car, 8=cat, 9=chair, 10=cow
    (0, 128, 128), (128, 128, 128), (64, 0, 0), (192, 0, 0), (64, 128, 0),
    # 11=dining table, 12=dog, 13=horse, 14=motorbike, 15=person
    (192, 128, 0), (64, 0, 128), (192, 0, 128), (64, 128, 128), (255, 255, 255),
    # 16=potted plant, 17=sheep, 18=sofa, 19=train, 20=tv/monitor
    (0, 64, 0), (128, 64, 0), (0, 192, 0), (128, 192, 0), (0, 64, 128)])

    r = np.zeros_like(image).astype(np.uint8)
    g = np.zeros_like(image).astype(np.uint8)
    b = np.zeros_like(image).astype(np.uint8)
    for l in range(0, nc):
        idx = image == l
        r[idx] = label_colors[l, 0]
        g[idx] = label_colors[l, 1]
        b[idx] = label_colors[l, 2]
        rgb = np.stack([r, g, b], axis=2)
    return rgb
2.2. 图像预处理与Forward
import matplotlib.pyplot as plt
import torchvision.transforms as T
import torch
from PIL import Image

def segment(net, path, show_orig=True, dev='cuda'):
    img = Image.open(path)
    if show_orig:
        plt.imshow(img);
        plt.axis('off');
        plt.show()

    # Comment the Resize and CenterCrop for better inference results
    trf = T.Compose([T.ToTensor(),
                     T.Normalize(mean = [0.485, 0.456, 0.406],
                                         std = [0.229, 0.224, 0.225])])
    inp = trf(img).unsqueeze(0).to(dev)
    out = net.to(dev)(inp)['out']
    om = torch.argmax(out.squeeze(), dim=0).detach().cpu().numpy()
    rgb = decode_segmap(om)
    return rgb
2.3. 加载 deeplabv3_resnet101 模型
from torchvision import models
dlab = models.segmentation.deeplabv3_resnet101(pretrained=1).eval()

rgb=segment(dlab, '/path/to/test.jpg')
## If there are multiple labeled objects in the image, use the below code to have only the target as the foreground
rgb[rgb!=255]=0
3. 背景融合(Alpha blending)实现
Alpha blending 是将前景图像和透明图覆盖到背景图像上的处理. 透明图通常是图像的第四个通道(如,透明 PNG),但其也可以是单独的图像. 透明 mask 图也一般被称为 alpha mask 或 alpha matte.
Alpha blending 背后的数据原理是比较直接的,对于图像的每个像素,需要采用 alpha mask 将前景图像颜色和背景图像颜色组合在一起.
前景图像是原始图像,灰度 alpha mask 是有语义分割得到的结果,背景图像是需要更换的新的定制图像.
#alpha blending to customize the background of the image

# Read the images
foreground = cv2.imread("/path/to/foreground.jpg")
background = cv2.imread("/path/to/background.jpg", cv2.IMREAD_COLOR)
background = cv2.resize(background, (rgb.shape[1],rgb.shape[0]), interpolation = cv2.INTER_AREA)
alpha = rgb # 2.3

# Convert uint8 to float
foreground = foreground.astype(float)
background = background.astype(float)
# Normalize the alpha mask to keep intensity between 0 and 1
alpha = alpha.astype(float)/255
# Multiply the foreground with the alpha matte
foreground = cv2.multiply(alpha, foreground)
# Multiply the background with ( 1 - alpha )
background = cv2.multiply(1.0 - alpha, background)
# Add the masked foreground and background.
outImage = cv2.add(foreground, background)

# Display image
cv2_imshow(outImage)
cv2.waitKey(0)
# Save/download image
cv2.imwrite('org_plus_cust_bkg_img.png' , outImage)
如:

图:语义分割和 alpha blending 的背景替换结果

图:语义分割和 alpha blending 的处理过程
4. 背景白化(Whiten)
#whiten the background of the image
mask_out=cv2.subtract(rgb,img)
mask_out=cv2.subtract(rgb,mask_out)
mask_out[rgb == 0] = 255

# Display the result
numpy_horizontal = np.hstack((img, mask_out))
numpy_horizontal_concat = np.concatenate((img, mask_out), axis=1)
cv2_imshow(numpy_horizontal_concat)
cv2.waitKey(0)
# Save/download the resulting image
cv2.imwrite('org_plus_white_bkg_image.jpeg',numpy_horizontal_concat)
如:
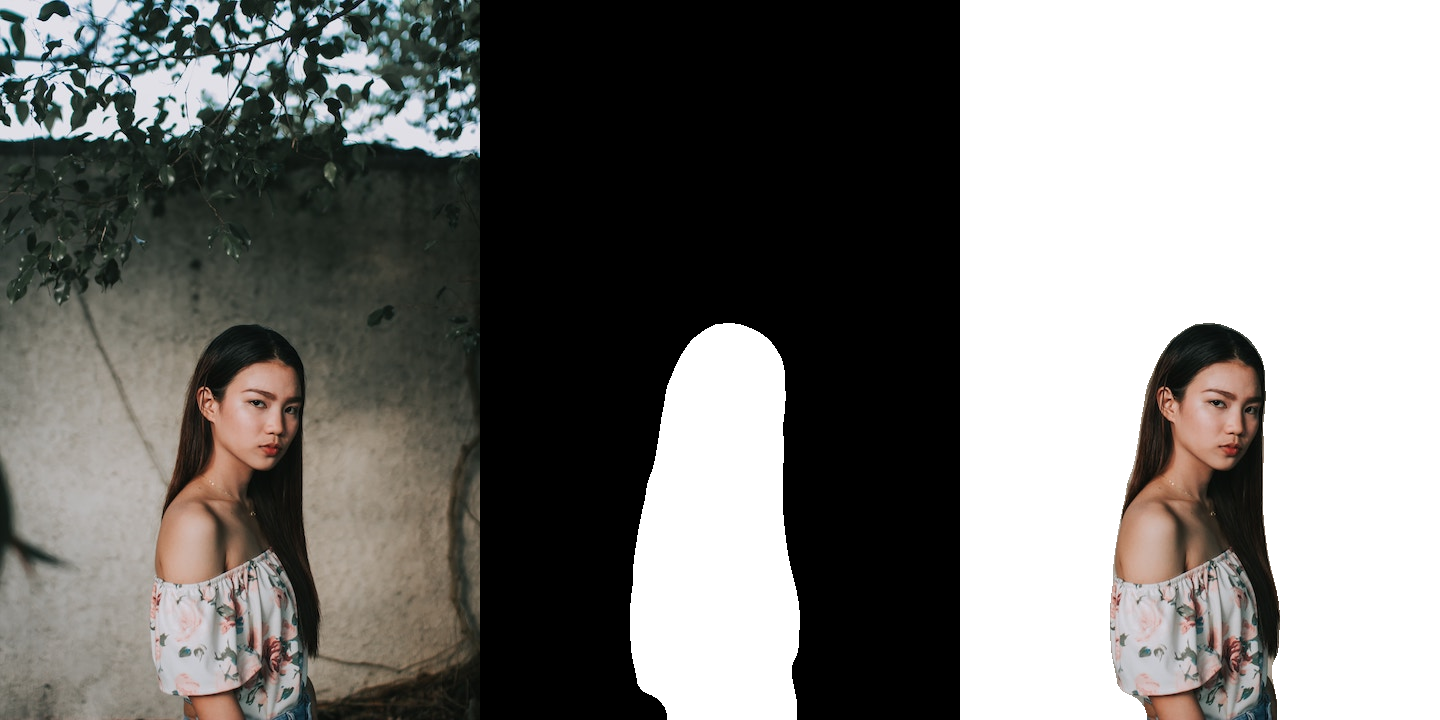
图:图像背景白化结果
5. 背景模糊(Blur)
# Read the images
foreground = cv2.imread("/path/to/girl8.jpg")

# Create a Gaussian blur of kernel size 7 for the background image
blurredImage = cv2.GaussianBlur(foreground, (7,7), 0)
# Convert uint8 to float
foreground = foreground.astype(float)
blurredImage = blurredImage.astype(float)

# Create a binary mask of the RGB output map using the threshold value 0
th, alpha = cv2.threshold(np.array(rgb),0, 255, cv2.THRESH_BINARY)

# Apply a slight blur to the mask to soften edges
alpha = cv2.GaussianBlur(alpha, (7,7),0)
# Normalize the alpha mask to keep intensity between 0 and 1
alpha = alpha.astype(float)/255
# Multiply the foreground with the alpha matte
foreground = cv2.multiply(alpha, foreground)
# Multiply the background with ( 1 - alpha )
background = cv2.multiply(1.0 - alpha, blurredImage)
# Add the masked foreground and background
outImage = cv2.add(foreground, background)

# Return a normalized output image for display
outImage= outImage
numpy_horizontal = np.hstack((img, outImage))
numpy_horizontal_concat = np.concatenate((img, outImage), axis=1)

# Display image
cv2_imshow(numpy_horizontal_concat)
cv2.waitKey(0)
# Save/download the resulting image
cv2.imwrite('res.png' , numpy_horizontal_concat)
如:
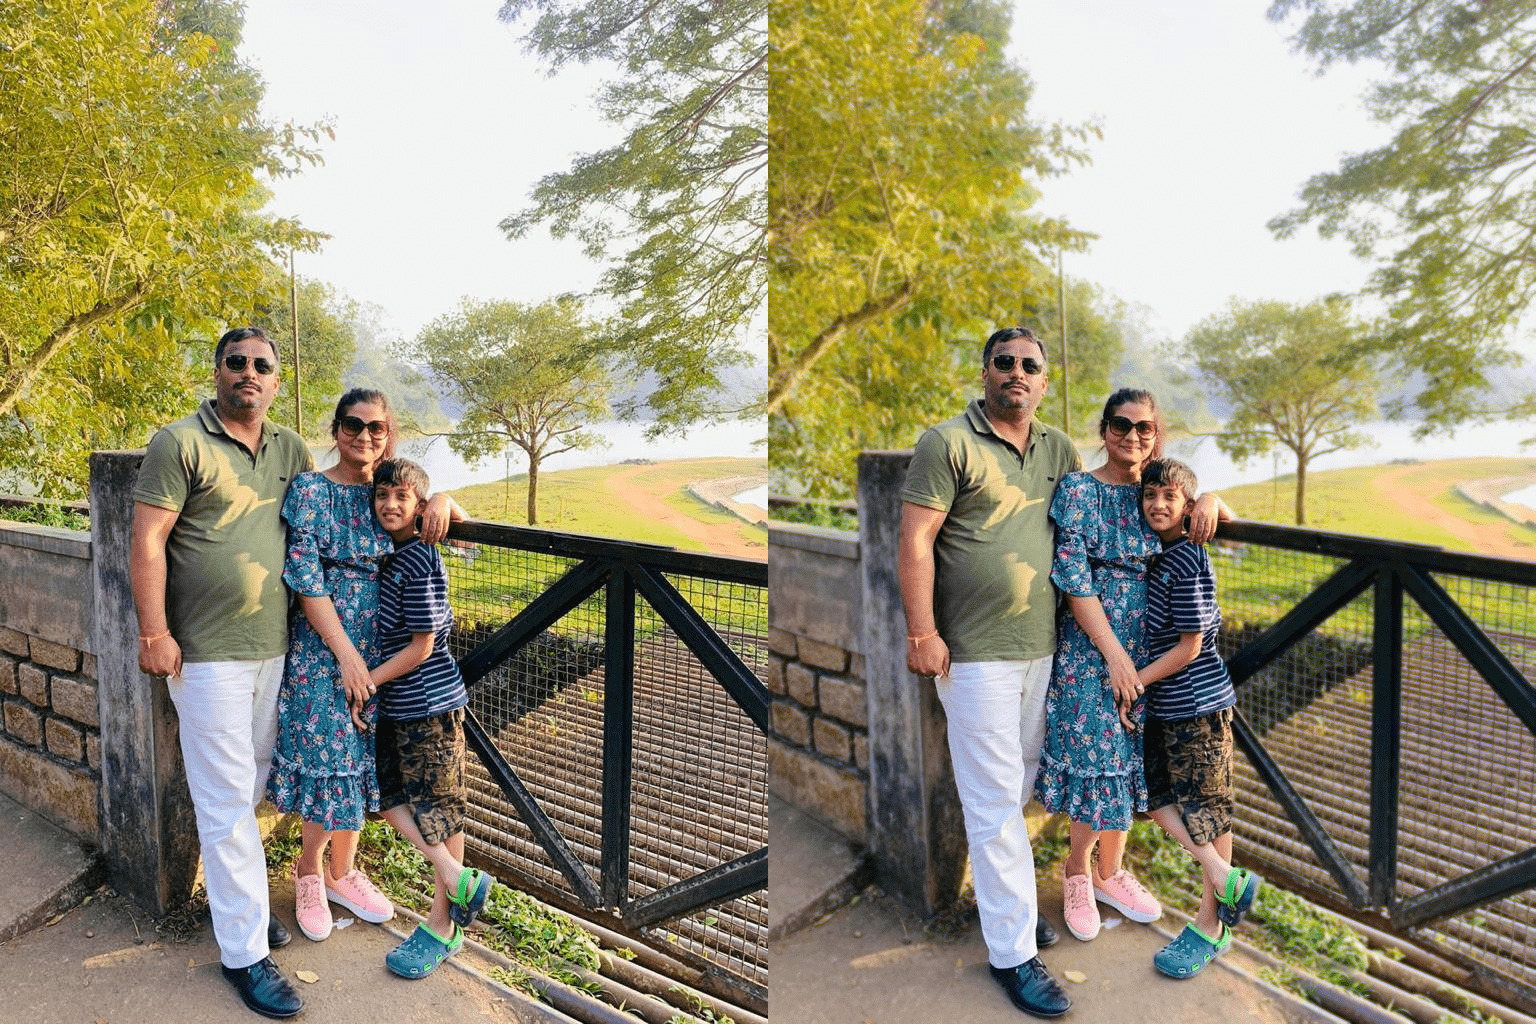
图:图像背景融合结果
6. 背景灰度化(Grayscale)
# Load the foreground input image
foreground = cv2.imread("/path/to/woman-with-car.jpg")

# Resize image to match shape of R-band in RGB output map
foreground = cv2.resize(foreground, (rgb.shape[1],rgb.shape[0]), interpolation = cv2.INTER_AREA)
# Create a background image by copying foreground and converting into grayscale
background = cv2.cvtColor(foreground, cv2.COLOR_BGR2GRAY)
# convert single channel grayscale image to 3-channel grayscale image
background = cv2.cvtColor(background, cv2.COLOR_GRAY2RGB)
# Convert uint8 to float
foreground = foreground.astype(float)
background = background.astype(float)
# Create a binary mask of the RGB output map using the threshold value 0
th, alpha = cv2.threshold(np.array(rgb),0,255, cv2.THRESH_BINARY)
# Apply a slight blur to the mask to soften edges
alpha = cv2.GaussianBlur(alpha, (7,7),0)
# Normalize the alpha mask to keep intensity between 0 and 1
alpha = alpha.astype(float)/255
# Multiply the foreground with the alpha matte
foreground = cv2.multiply(alpha, foreground)
# Multiply the background with ( 1 - alpha )
background = cv2.multiply(1.0 - alpha, background)
# Add the masked foreground and background
outImage = cv2.add(foreground, background)
numpy_horizontal = np.hstack((img, outImage))
numpy_horizontal_concat = np.concatenate((img, outImage), axis=1)

# Display image
cv2_imshow(numpy_horizontal_concat)
cv2.waitKey(0)
# Save image
cv2.imwrite('res.png' , numpy_horizontal_concat)
如:
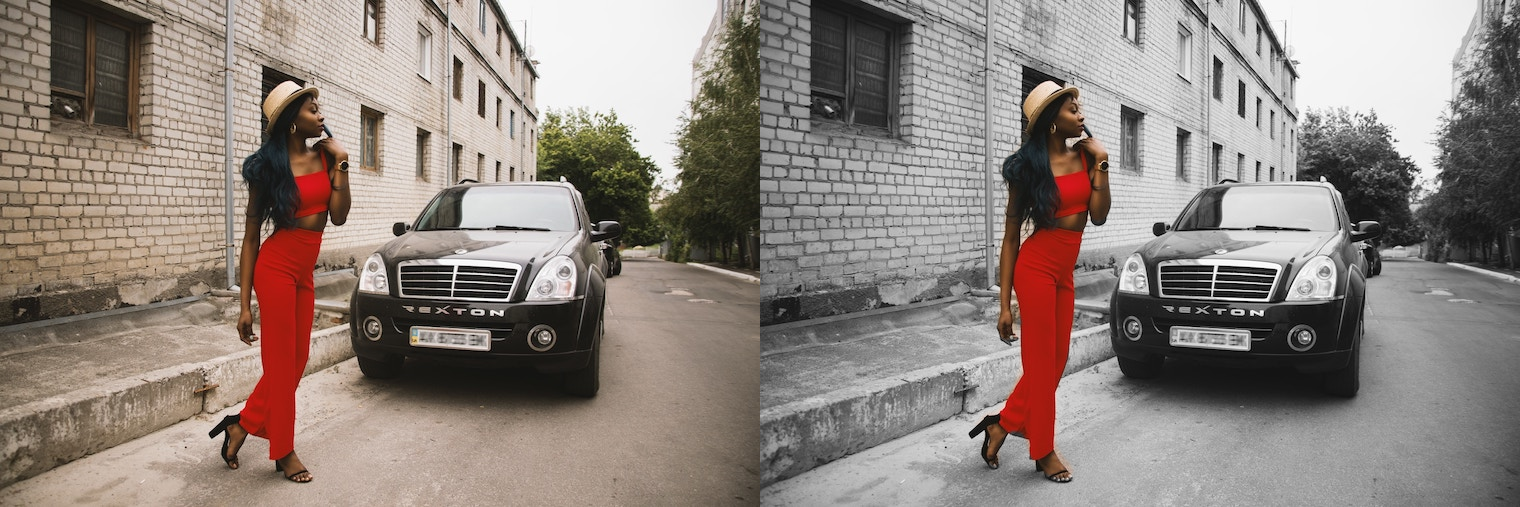
图:背景灰度化结果

图:背景灰度化处理过程
参考
- Alpha Blending — https://www.learnopencv.com/alpha-blending-using-opencv-cpp-python/
- Semantic Segmentation — https://www.learnopencv.com/pytorch-for-beginners-semantic-segmentation-using-torchvision/
- DeepLab — https://github.com/tensorflow/models/tree/master/research/deeplab
- https://www.learnopencv.com/applications-of-foreground-background-separation-with-semantic-segmentation/
2 条评论
博主,背景融合的代码里的rgb是怎么来的哇?感谢~٩(ˊᗜˋ*)و
我明白了(ฅ´ω`ฅ)