在 OpenCV4.X 版本(OpenCV3.4.1之后版本) 可以采用 cv2.dnn.readNetFromTensorflow(pbmodel, pbtxt) 函数直接调用 TensorFlow 训练的目标检测模型.
1. TensorFlow Detection Model Zoo
TensorFlow 目标检测预训练模型:
1.1. 基于 COCO 数据训练的模型
注:
[1] - 带五角星符号(☆) 表示模型支持 TPU 训练.
[2] - 下载 quantized 模型的 .tar.gz 文件并解压后,会得到不同的文件,包括:checkpoint 文件,config 配置文件和 tfile frozen graphs(txt/binary)文件.
1.2. 基于 Kitti 数据集训练的模型
| Model name | Speed (ms) | Pascal mAP@0.5 | Outputs |
|---|---|---|---|
| faster_rcnn_resnet101_kitti | 79 | 87 | Boxes |
1.3. 基于 Open Images 数据集训练的模型
| Model name | Speed (ms) | Open Images mAP@0.52 | Outputs |
|---|---|---|---|
| faster_rcnn_inception_resnet_v2_atrous_oidv2 | 727 | 37 | Boxes |
| faster_rcnn_inception_resnet_v2_atrous_lowproposals_oidv2 | 347 | Boxes | |
| facessd_mobilenet_v2_quantized_open_image_v4 3 | 20 | 73 (faces) | Boxes |
| Model name | Speed (ms) | Open Images mAP@0.54 | Outputs |
|---|---|---|---|
| faster_rcnn_inception_resnet_v2_atrous_oidv4 | 425 | 54 | Boxes |
| ssd_mobilenetv2_oidv4 | 89 | 36 | Boxes |
| ssd_resnet_101_fpn_oidv4 | 237 | 38 | Boxes |
1.4. 基于 iNaturalist Species 数据集训练的模型
| Model name | Speed (ms) | Pascal mAP@0.5 | Outputs |
|---|---|---|---|
| faster_rcnn_resnet101_fgvc | 395 | 58 | Boxes |
| faster_rcnn_resnet50_fgvc | 366 | 55 | Boxes |
1.5. 基于 AVA v2.1 训练的模型
| Model name | Speed (ms) | Pascal mAP@0.5 | Outputs |
|---|---|---|---|
| faster_rcnn_resnet101_ava_v2.1 | 93 | 11 | Boxes |
1.6. TensorFlow 目标检测 API - SSD 例示
TensorFlow 中,深度学习网络被表示为图(graphs),其中图中每个节点(node) 是其输入的一种变换. 节点可以是常用网络层,如 C++ 实现的 Convolution 和 MaxPooling 层. 也可以采用 python 利用 TensorFlow 操作子(operations) 来构建自定义网络层.
TensorFlow 目标检测API 是用于创建目标检测深度网络的框架.
TensorFlow 训练得到的模型是 .pb 后缀的二值文件,其同时保存了训练网络的拓扑(topology)结构和模型权重.
这里以 ssd_mobilenet_v2_coco_2018_03_29 预训练模型(基于 COCO 数据集训练的 MobileNet-SSD模型)为例:
#!/usr/bin/python3
#!--*-- coding:utf-8 --*--
import os
import numpy as np
import cv2
import matplotlib.pyplot as plt
import tensorflow as tf


model_path = "/path/to/ssd_mobilenet_v2_coco_2018_03_29"
frozen_pb_file = os.path.join(model_path, 'frozen_inference_graph.pb')

score_threshold = 0.3

img_file = 'test.jpg'

# Read the graph.
with tf.gfile.FastGFile(frozen_pb_file, 'rb') as f:
    graph_def = tf.GraphDef()
    graph_def.ParseFromString(f.read())


with tf.Session() as sess:
    # Restore session
    sess.graph.as_default()
    tf.import_graph_def(graph_def, name='')

    # Read and preprocess an image.
    img_cv2 = cv2.imread(img_file)
    img_height, img_width, _ = img_cv2.shape

    img_in = cv2.resize(img_cv2, (300, 300))
    img_in = img_in[:, :, [2, 1, 0]]  # BGR2RGB

    # Run the model
    outputs = sess.run([sess.graph.get_tensor_by_name('num_detections:0'),
                    sess.graph.get_tensor_by_name('detection_scores:0'),
                    sess.graph.get_tensor_by_name('detection_boxes:0'),
                    sess.graph.get_tensor_by_name('detection_classes:0')],
                   feed_dict={
                       'image_tensor:0': img_in.reshape(1,
                                                        img_in.shape[0],
                                                        img_in.shape[1],
                                                        3)})

    # Visualize detected bounding boxes.
    num_detections = int(outputs[0][0])
    for i in range(num_detections):
        classId = int(outputs[3][0][i])
        score = float(outputs[1][0][i])
        bbox = [float(v) for v in outputs[2][0][i]]
        if score > score_threshold:
            x = bbox[1] * img_width
            y = bbox[0] * img_height
            right = bbox[3] * img_width
            bottom = bbox[2] * img_height
            cv2.rectangle(img_cv2,
                          (int(x), int(y)),
                          (int(right), int(bottom)),
                          (125, 255, 51),
                          thickness=2)

plt.figure(figsize=(10, 8))
plt.imshow(img_cv2[:, :, ::-1])
plt.title("TensorFlow MobileNetV2-SSD")
plt.axis("off")
plt.show()
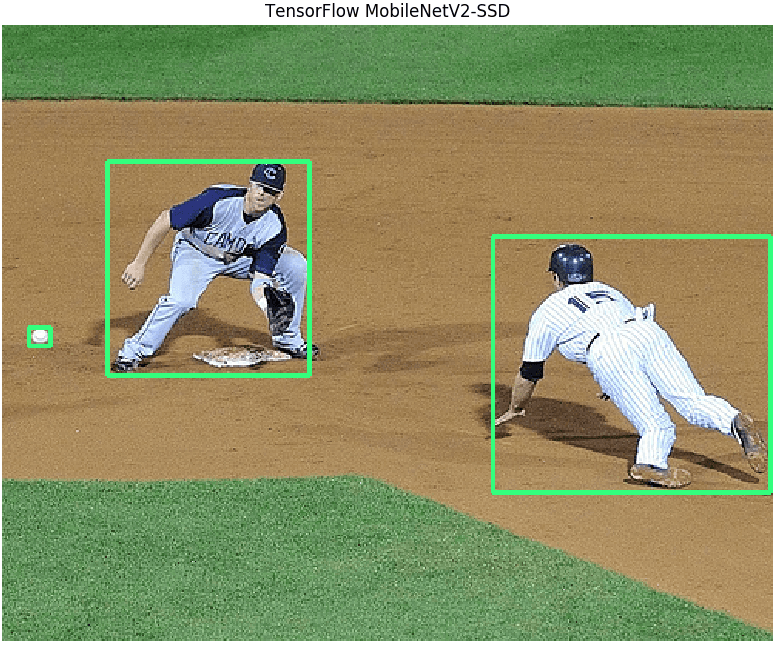
目标检测结果如:

https://github.com/opencv/opencv/wiki/TensorFlow-Object-Detection-API
2. TensorFlow 目标检测模型转换为 DNN 可调用格式
OpenCV DNN 模块调用 TensorFlow 训练的目标检测模型时,需要一个额外的配置文件,其主要是基于与 protocol buffers(protobuf) 格式序列化图(graph) 相同的文本格式版本.
2.1. DNN 已可直接调用检测模型
OpenCV 中已经提供的 TensorFlow 目标检测模型和配置文件有:
| Model | Version | ||
|---|---|---|---|
| MobileNet-SSD v1 | 2017_11_17 | weights | config |
| MobileNet-SSD v1 PPN | 2018_07_03 | weights | config |
| MobileNet-SSD v2 | 2018_03_29 | weights | config |
| Inception-SSD v2 | 2017_11_17 | weights | config |
| Faster-RCNN Inception v2 | 2018_01_28 | weights | config |
| Faster-RCNN ResNet-50 | 2018_01_28 | weights | config |
| Mask-RCNN Inception v2 | 2018_01_28 | weights | config |
2.2. 常用目标检测模型转换
三种不同的 TensorFlow 目标检测模型转换脚本为:
From: https://github.com/opencv/opencv/tree/master/samples/dnn
转换脚本的输入参数:
[1] - --input: TensorFlow frozen graph 文件路径.
[2] - --config: TensorFlow 模型训练时的 *.config 文件路径.
注: TensorFlow *.config配置文件:configuration file.
转换脚本的输出参数:
[1] - --output: 输出的 text graph 文件.
如:
faster rcnn 模型:
 python3 tf_text_graph_faster_rcnn.py \
     --input '/path/to/faster_rcnn_resnet50_coco_2018_01_28/frozen_inference_graph.pb' \
     --config '/path/to/faster_rcnn_resnet50_coco.config' \
     --output '/path/to/faster_rcnn_resnet50_coco_2018_01_28/graph.pbtxt'
ssd 模型:
python3 tf_text_graph_ssd.py \
    --input /path/to/ssd_inception_v2_coco_2018_01_28/frozen_inference_graph.pb \
    --config /path/to/ssd_inception_v2_coco.config \
    --output /path/to/ssd_inception_v2_coco_2018_01_28/graph.pbtxt
mask rcnn 模型:
python3 tf_text_graph_mask_rcnn2.py \
    --input '/path/to/mask_rcnn_resnet50_atrous_coco_2018_01_28/frozen_inference_graph.pb' \
    --config '/path/to/mask_rcnn_resnet50_atrous_coco.config' \
    --output '/path/to/mask_rcnn_resnet50_atrous_coco_2018_01_28/graph.pbtxt'
对于生成的 graph.pbtxt 可采用 Netron 工具进行可视化.
2.3. DNN 目标检测 - SSD 例示
与 TensorFLow 目标检测 API -SSD 例示 一样,检测测试下基于 OpenCV DNN 的 SSD 目标检测.
[1] - 首先进行模型转换,如:
python3 tf_text_graph_ssd.py \
    --input '/path/to/ssd_mobilenet_v2_coco_2018_03_29/frozen_inference_graph.pb' \
    --config '/path/to/ssd_mobilenet_v2_coco.config' \
    --output '/path/to/ssd_mobilenet_v2_coco_2018_03_29/graph.pbtxt'
终端打印的转换过程如:
Scale: [0.200000-0.950000]
Aspect ratios: [1.0, 2.0, 0.5, 3.0, 0.3333]
Reduce boxes in the lowest layer: True
Number of classes: 90
Number of layers: 6
box predictor: convolutional
Input image size: 300x300
[2] - 然后,目标检测模型测试:
#!/usr/bin/python
#!--*-- coding:utf-8 --*--
import cv2
import matplotlib.pyplot as plt


pb_file = '/path/to/ssd_inception_v2_coco_2018_01_28/frozen_inference_graph.pb'
pbtxt_file = '/path/to/ssd_inception_v2_coco_2018_01_28/graph.pbtxt'
net = cv2.dnn.readNetFromTensorflow(pb_file, pbtxt_file)

score_threshold = 0.3

img_file = 'test.jpg'

img_cv2 = cv2.imread(img_file)
height, width, _ = img_cv2.shape
net.setInput(cv2.dnn.blobFromImage(img_cv2,
                                   size=(300, 300),
                                   swapRB=True,
                                   crop=False))

out = net.forward()
print(out)

for detection in out[0, 0, :,:]:
    score = float(detection[2])
    if score > score_threshold:
        left = detection[3] * width
        top = detection[4] * height
        right = detection[5] * width
        bottom = detection[6] * height
        cv2.rectangle(img_cv2,
                      (int(left), int(top)),
                      (int(right), int(bottom)),
                      (23, 230, 210),
                      thickness=2)

t, _ = net.getPerfProfile()
label = 'Inference time: %.2f ms' % \
            (t * 1000.0 / cv2.getTickFrequency())
cv2.putText(img_cv2, label, (0, 15),
            cv2.FONT_HERSHEY_SIMPLEX, 0.5, (0, 0, 255))


plt.figure(figsize=(10, 8))
plt.imshow(img_cv2[:, :, ::-1])
plt.title("OpenCV DNN MobileNetV2-SSD")
plt.axis("off")
plt.show()
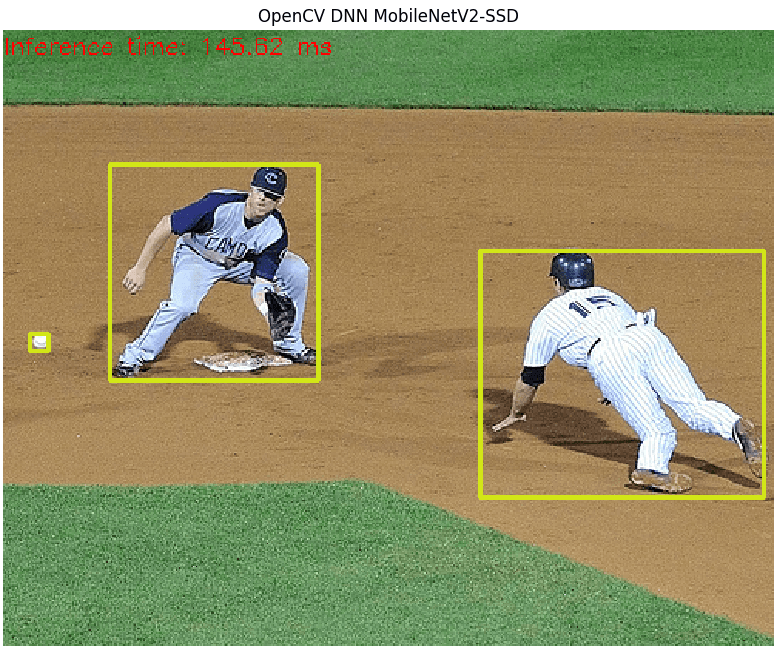
目标检测结果如:
