Tensorflow 提供了很多 API 和模型, 如 object_detection, deeplab, im2txt 等.
这里介绍 Tensorflow 目标检测 API 的使用.
也提供了 Mask R-CNN 实例分割模型.
1. 目标检测 API 安装
1.1 依赖库
- Protobuf 3+
- Python-tk
- Pillow 1.0
- lxml
- tf Slim (路径: "tensorflow/models/research/")
- Jupyter notebook
- Matplotlib
- Tensorflow
- Cython
- cocoapi
其中, Mask R-CNN 的 Tensorflow 版本应该是 >=1.5.0
Tensorflow 的安装
或者:
# For CPU
sudo pip install tensorflow
# For GPU
sudo pip install tensorflow-gpu
其它依赖库的安装 (Ubuntu 16.04):
sudo apt-get install protobuf-compiler python-pil python-lxml python-tk
sudo pip install Cython
sudo pip install jupyter
sudo pip install matplotlib
````
或者(pip 安装):
```shell
sudo pip install Cython
sudo pip install pillow
sudo pip install lxml
sudo pip install jupyter
sudo pip install matplotlib
1.2 COCO API 安装
可选.
如果需要用到 COCO 的评价度量(评价指标), 进行如下:
- 下载 cocoapi;
- 复制其中的 pycocotools 到子目录 tensorflow/models/research.
默认使用的评价度量是 Pascal VOC 指标.
使用 COCO 目标检测度量, 需要在 confile 文件的 eval_config 中添加 metrics_set: "coco_detection_metrics".
使用 COCO 实例分割度量,需要在 confile 文件的 eval_config 中添加 metrics_set: "coco_mask_metrics".
git clone https://github.com/cocodataset/cocoapi.git
cd cocoapi/PythonAPI
make
cp -r pycocotools <path_to_tensorflow>/models/research/
1.3 Protobuf 编译
Tensorflow 目标检测 API 使用 Protobuf 来配置模型和训练参数.
因此, 必须提前编译 Protobuf 库.
在目录 tensorflow/models/research/ 路径运行:
# From tensorflow/models/research/
protoc object_detection/protos/*.proto --python_out=.
这里可能出现错误,
object_detection/protos/anchor_generator.proto:11:3: Expected "required", "optional", or "repeated".
object_detection/protos/anchor_generator.proto:11:32: Missing field number.
原因是: protoc 版本太低, 可以下载高版本 protoc,
下载地址: https://github.com/google/protobuf/releases/
如:
#download protoc 3.3
cd /opt/
mkdir protoc3.3
cd protoc3.3
wget https://github.com/google/protobuf/releases/download/v3.3.0/protoc-3.3.0-linux-x86_64.zip
unzip protoc-3.3.0-linux-x86_64.zip
重新运行下面的命令, 来编译 Protobuf 库:
cd tensorflow/models/
/opt/protoc3.3/bin/protoc object_detection/protos/*.proto --python_out=.
即可.(不会出现任何显示.)
1.4 添加到环境变量
需要将 tensorflow/models/research/ 和 slim 路径添加到 PYTHONPATH.
在 tensorflow/models/research/ 路径运行:
# From tensorflow/models/research/
export PYTHONPATH=$PYTHONPATH:`pwd`:`pwd`/slim
或者添加到 ~/.bashrc 环境变量:
export PYTHONPATH=$PYTHONPATH:/path/to/tensorflow/models/research:/path/to/tensorflow/models/slim
1.5 测试安装
运行以下命令, 测试 Tensorflow 目标检测 API 是否安装成功:
python object_detection/builders/model_builder_test.py
如果出现以下类似错误:
from nets import inception_resnet_v2
ImportError: No module named nets
可能是环境变量设置问题.
参考 Github-issue - ImportError: No module named nets.
也可以在 object_detection/builders/model_builder_test.py 脚本中添加:
import sys
sys.path.append("/path/to/tensorflow/models/research/slim")
测试成功会出现:
...............
----------------------------------------------------------------------
Ran 15 tests in 0.048s

OK
2. Tensorflow Detection Model Zoo
Tensorflow 提供了在 COCO dataset, Kitti dataset, Open Images dataset 上的预训练模型.
下载地址: Tensorflow detection model zoo
下载模型即可测试使用.
重要: Tensorflow 1.5 以上!!!
在 Tensorflow 1.4.0 版本测试模型 mask_rcnn_inception_v2_coco_2018_01_28 出现错误:
InvalidArgumentError (see above for traceback): NodeDef mentions attr 'identical_element_shapes' not in Op<name=TensorArrayV3; signature=size:int32 -> handle:resource, flow:float; attr=dtype:type; attr=element_shape:shape,default=<unknown>; attr=dynamic_size:bool,default=false; attr=clear_after_read:bool,default=true; attr=tensor_array_name:string,default=""; is_stateful=true>; NodeDef: Preprocessor/map/TensorArray = TensorArrayV3[clear_after_read=true, dtype=DT_FLOAT, dynamic_size=false, element_shape=<unknown>, identical_element_shapes=true, tensor_array_name="", _device="/job:localhost/replica:0/task:0/device:GPU:0"](Preprocessor/map/TensorArrayUnstack/strided_slice). (Check whether your GraphDef-interpreting binary is up to date with your GraphDef-generating binary.).
     [[Node: Preprocessor/map/TensorArray = TensorArrayV3[clear_after_read=true, dtype=DT_FLOAT, dynamic_size=false, element_shape=<unknown>, identical_element_shapes=true, tensor_array_name="", _device="/job:localhost/replica:0/task:0/device:GPU:0"](Preprocessor/map/TensorArrayUnstack/strided_slice)]]
参考 Github-issue - Test Faster RCNN with GTX 1080.
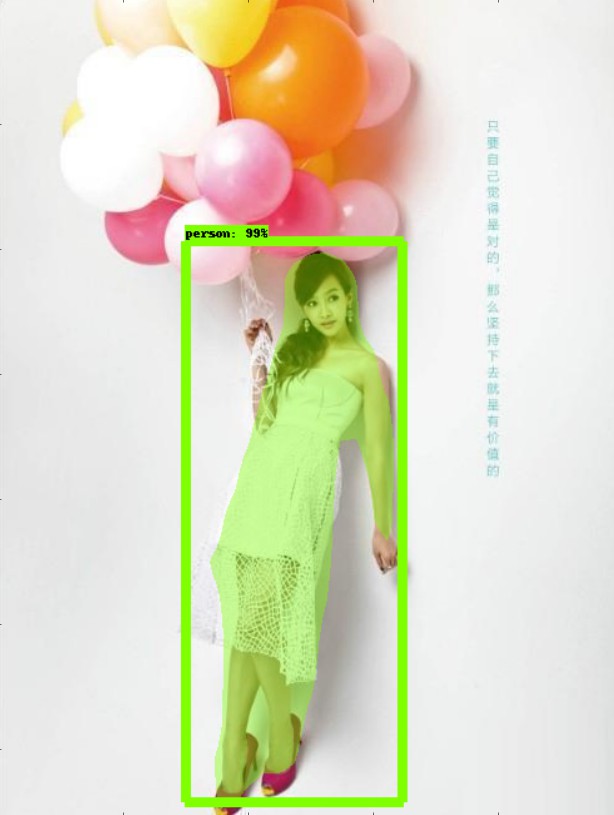
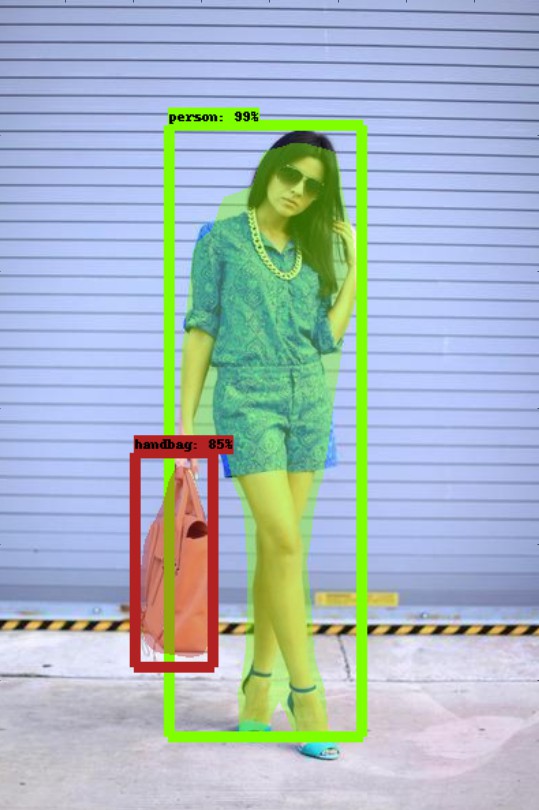
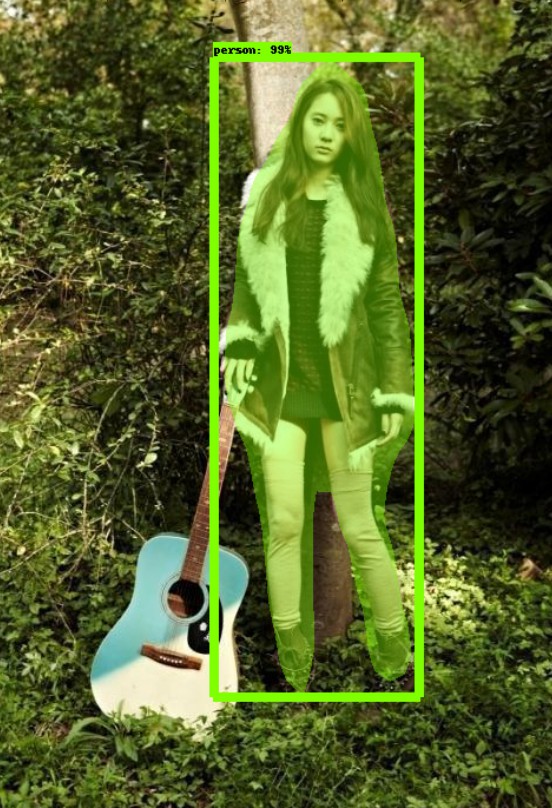
3. API 测试 Demo
Object Detection Demo - object_detection_tutorial.ipynb
# --*-- coding: utf-8 --*--
# Object Detection Demo

import numpy as np
import os
import six.moves.urllib as urllib
import sys
import tarfile
import tensorflow as tf
import zipfile

if tf.__version__ < '1.4.0':
  raise ImportError('Please upgrade your tensorflow installation to v1.4.* or later!')

sys.path.append("/path/to/models/research/object_detection")
from object_detection.utils import ops as utils_ops
from object_detection.utils import label_map_util
from object_detection.utils import visualization_utils as vis_util


from collections import defaultdict
from io import StringIO
from matplotlib import pyplot as plt
from PIL import Image


# 使用的模型
MODEL_NAME = 'mask_rcnn_inception_v2_coco_2018_01_28'
MODEL_FILE = MODEL_NAME + '.tar.gz'

# frozen detection graph. This is the actual model that is used for the object detection.
PATH_TO_CKPT = 'models/' + MODEL_NAME + '/frozen_inference_graph.pb'

# List of the strings that is used to add correct label for each box.
PATH_TO_LABELS = os.path.join('../models/research/object_detection', 'data', 'mscoco_label_map.pbtxt')
NUM_CLASSES = 90

detection_graph = tf.Graph()
with detection_graph.as_default():
  od_graph_def = tf.GraphDef()
  with tf.gfile.GFile(PATH_TO_CKPT, 'rb') as fid:
    serialized_graph = fid.read()
    od_graph_def.ParseFromString(serialized_graph)
    tf.import_graph_def(od_graph_def, name='')

label_map = label_map_util.load_labelmap(PATH_TO_LABELS)
categories = label_map_util.convert_label_map_to_categories(label_map, max_num_classes=NUM_CLASSES, use_display_name=True)
category_index = label_map_util.create_category_index(categories)


def load_image_into_numpy_array(image):
  (im_width, im_height) = image.size
  return np.array(image.getdata()).reshape((im_height, im_width, 3)).astype(np.uint8)


##
PATH_TO_TEST_IMAGES_DIR = '../models/research/object_detection/test_images'
TEST_IMAGE_PATHS = [os.path.join(PATH_TO_TEST_IMAGES_DIR, 'image{}.jpg'.format(i)) for i in range(1, 3) ]

# Size, in inches, of the output images.
IMAGE_SIZE = (12, 8)


def run_inference_for_single_image(image, graph):
  with graph.as_default():
    with tf.Session() as sess:
      # Get handles to input and output tensors
      ops = tf.get_default_graph().get_operations()
      all_tensor_names = {output.name for op in ops for output in op.outputs}
      tensor_dict = {}
      for key in ['num_detections', 'detection_boxes', 'detection_scores',
                  'detection_classes', 'detection_masks']:
        tensor_name = key + ':0'
        if tensor_name in all_tensor_names:
          tensor_dict[key] = tf.get_default_graph().get_tensor_by_name(tensor_name)

      if 'detection_masks' in tensor_dict:
        # The following processing is only for single image
        detection_boxes = tf.squeeze(tensor_dict['detection_boxes'], [0])
        detection_masks = tf.squeeze(tensor_dict['detection_masks'], [0])
        # Reframe is required to translate mask from box coordinates to image coordinates and fit the image size.
        real_num_detection = tf.cast(tensor_dict['num_detections'][0], tf.int32)
        detection_boxes = tf.slice(detection_boxes, [0, 0], [real_num_detection, -1])
        detection_masks = tf.slice(detection_masks, [0, 0, 0], [real_num_detection, -1, -1])
        detection_masks_reframed = utils_ops.reframe_box_masks_to_image_masks(
            detection_masks, detection_boxes, image.shape[0], image.shape[1])
        detection_masks_reframed = tf.cast(
            tf.greater(detection_masks_reframed, 0.5), tf.uint8)
        # Follow the convention by adding back the batch dimension
        tensor_dict['detection_masks'] = tf.expand_dims(detection_masks_reframed, 0)

      image_tensor = tf.get_default_graph().get_tensor_by_name('image_tensor:0')

      # Run inference
      output_dict = sess.run(tensor_dict,feed_dict={image_tensor: np.expand_dims(image, 0)})


      # all outputs are float32 numpy arrays, so convert types as appropriate
      output_dict['num_detections'] = int(output_dict['num_detections'][0])
      output_dict['detection_classes'] = output_dict['detection_classes'][0].astype(np.uint8)
      output_dict['detection_boxes'] = output_dict['detection_boxes'][0]
      output_dict['detection_scores'] = output_dict['detection_scores'][0]
      if 'detection_masks' in output_dict:
        output_dict['detection_masks'] = output_dict['detection_masks'][0]
  return output_dict


for image_path in TEST_IMAGE_PATHS:
  image = Image.open(image_path)
  # the array based representation of the image will be used later in order to prepare the
  # result image with boxes and labels on it.
  image_np = load_image_into_numpy_array(image)
  # Expand dimensions since the model expects images to have shape: [1, None, None, 3]
  image_np_expanded = np.expand_dims(image_np, axis=0)
  # Actual detection.
  output_dict = run_inference_for_single_image(image_np, detection_graph)
  # Visualization of the results of a detection.
  vis_util.visualize_boxes_and_labels_on_image_array(
      image_np,
      output_dict['detection_boxes'],
      output_dict['detection_classes'],
      output_dict['detection_scores'],
      category_index,
      instance_masks=output_dict.get('detection_masks'),
      use_normalized_coordinates=True,
      line_thickness=8)
  plt.figure(figsize=IMAGE_SIZE)
  plt.imshow(image_np)
  plt.show()

print('Done.')
注: 为了显示 pyplot 的 figure, 需要提前设置 matplotlib 的 backend.
print(matplotlib.get_backend()) # 默认的是 agg, 即不显示 figure
需要进行的修改为:
编辑 from object_detection.utils import visualization_utils as vis_util 中的 visualization_utils.py,注释掉以下部分:
#import matplotlib; matplotlib.use('Agg') # pylint: disable=multiple-statements
results